Wednesday, December 10, 2014

Creating a Scene
In class today, choose at least three to five images to create a scene. Your theme is inspired by this sentence.
"The calm before the storm"

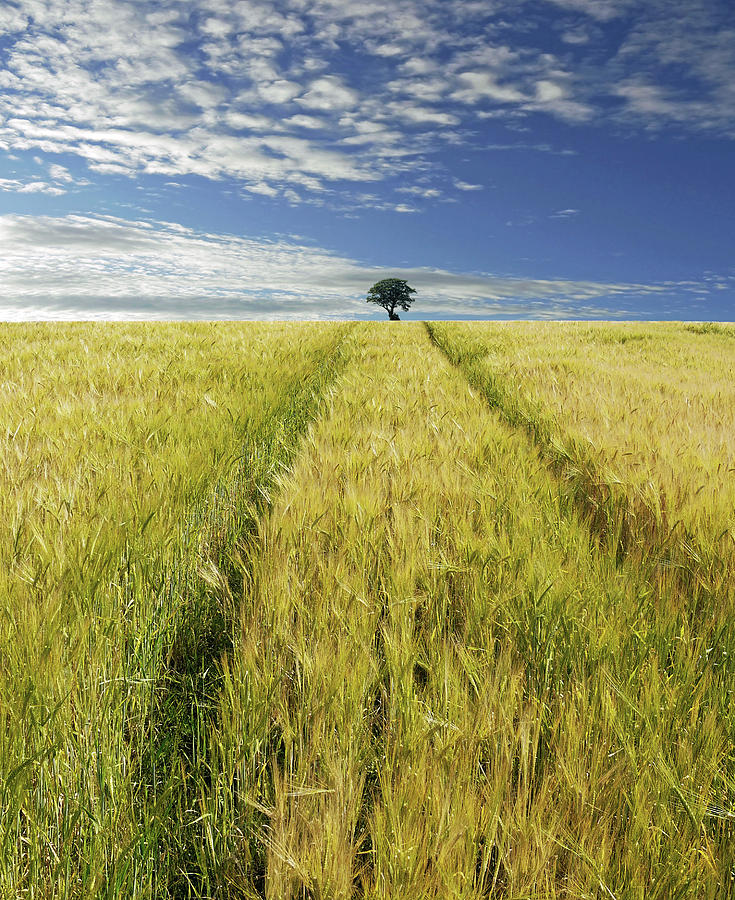
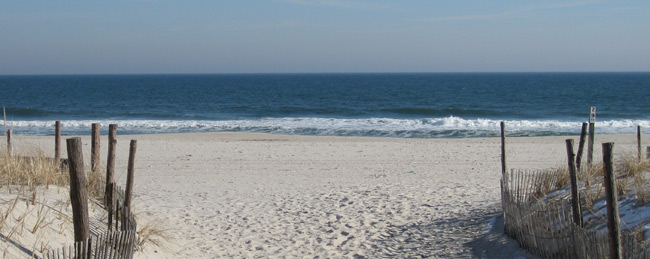
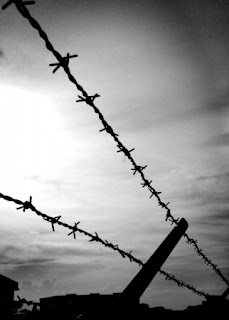
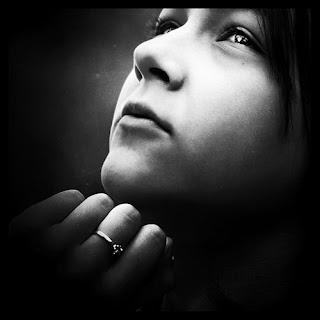
You can use any of the following images below as a background and find images on the web to add in, however, use discretion.
  • Consider resolution: must be high enough: do not use images below 500 pixels
  • Use at least three images
  • No Inappropriate images: weapons, drugs, violence, nudity, sexual connotations

Collect your images and put into a folder on your desktop. Next week will begin the illustration. New color and effect tools will be introduced and demonstrated to add to your tool box.


Monday, December 1, 2014

Creating a montage

Creating a photo illustration using Photoshop
 
Steps:
  • Read the copy
  • Right click save all 4 images to your desktop into a new folder called photo illo
  • Watch demo and follow handouts
  • Create your own version of the illo

 
We will begin to explore several of the fun filters and features of photoshop which many of you have discovered through experimenting but really never knew how to incorporate. You also will be working in layers and measuring the resolution. Remember: do not work in RGB, do not stretch photos beyond their compacity and save in photoshop not as a jpg. Do not flatten.

 
Photo Illustration - is conceptual photography which combines unity imagination and a message. It could be considered surreal and definitely driven by the imagination. Illustration is the visual solution to a literal meaning and has always been created thru drawing, painting, collage. . .but with the invention of photoshop came the manipulation of photography. This opened up the avenue to use photography as a technique in illustration as well.

We will complete several small exercises which will require you to implement the tools you will be learning the next few days. Your ability to demonstrate how to apply this effects will aide you in your photo illustration in our project on Dante's Inferno. Lets begin!

Down load the following images to your shortcut folder into a new folder called Photoshop filters.


Following the demo of the tools and the handout you were given, create your own layout of these elements. You must incorporate:

Ghosting - altering opacity
Silos - selecting using the wand or path
Feather - softening the edges
Smudging - breaking the definition
Invert - flipping the color
Fills - adding color
Cropping and enlarging - for positioning
Layers - pages images reside on
Resolution - maintaining the appropriate PPI
Movement tool - begin able to move images within the layers


I also recommend you apply any/all of the transform and color tools, cropping, cloning tools we have implemented.

These lessons will take a few days. Concentration is vital. If you are feeling confused at anytime, you can come during study, lunch or after school on Tuesdays. Please give me advance notice for after school.


Idea book page: photo illustration

Creating a photo illustration


For your Idea book, fill a page with digital and hand collaged photo illustrations found in magazines. Must be appropriate and the page must be filled with at least 20 different ones (cannot use the ones on this blog). Online, you can also look at Amy Guip, www.illustrationmundo.com, or Google digital photo montage. Fill a page with a mix from magazines and computer not all one. Put together on a document, print at 1505 or 1500 and collage together with magazines. Print images ganged up on one - three pages please not single images on one page.


1. Finish Matt Mahurin blog: answer question and complete digital assignment
2. Begin the idea book page.


Due by Next class November Dec 3/5, 2014

Wednesday, November 19, 2014

Photo illusion


Herewith, American Photo presents Matt Mahurin who are taking manipulation to brilliant extremes. For each of him, post-production is as important as camera work—and each discipline intimately informs the other. None of this work could have existed before Photoshop, none of their subjects exist in real life, and we find the whole thing terribly exciting.

When you commission a graphic from Matt Mahurin, you never know what you’re going to get. Which is the whole point. Skipping around his toolbox, Mahurin uses whichever media combination will help him create charged images to illustrate difficult stories. No wonder, then, that publications such as Time, Rolling Stone and Men’s Journal hire him to make visual sense of complex topics like Abu Ghraib or the Wall Street crisis.


But while his technique is top-notch, editors and art directors come to Mahurin, based in New York City, for something beyond Photoshop expertise. “They come to me for my point of view,” says Mahurin, who began working with Photoshop soon after its launch in 1990 and personally executes every stage of his photo illustrations. “I walk the line of having an emotional take while working with the point of view of the article.”


Mahurin’s body of work can be read as a chronology of society’s troubles, from the Cold War to AIDS to domestic violence to Middle East strife. Through it all, though, he retains the same artistic sensibility, consistent as any great photographer or painter. “People see Photoshop as a crutch,” he says, “but I see it more as a modern-day dark room where you strive to create a master print.”


Question: Put in your own words what this quote means from the article, what is he saying. Write your answer in an email to me at rmalik@rbrhs.org


 “They come to me for my point of view,” says Mahurin, who began working with Photoshop soon after its launch in 1990 and personally executes every stage of his photo illustrations. “I walk the line of having an emotional take while working with the point of view of the article.”


Next, the Assignment:

  • Chose a portrait from the below, right click to save it to your desktop folder.
  • Separate the image from background (layers).
  • Convert to CMYK
  • Begin to experiment:
  • Try Image/Adjustment/Hue Saturation tool, levels or curves
  • Try: Filters (sample different ones) see screen captures
  • NOTE: some options will not show as available unless you choose one channel in the channel menu (windows/channel) select one color channel at a time (hint: just like grain or blur)
  • Be creative without losing the face and maintaining the image see the powerpoint.
  • Have fun with it!


This is a preliminary exercise. You will complete several before you create your own conceptual photo in a few weeks. For now you will:


  1. Complete Mat Mahurin blog on a Google doc, share with me (rmalik@rbrhs.org) by December 28
  2. Complete the portrait exercise (a handout of power point will be given to guide where to locate photoshop filter tools). When you finish save a jpg and place the jpg on a Google doc and share with me by February 1
  3. Begin the photo montage (a packet to guide you will be provided and photos to use will be on the blog site to download). When complete this will be placed on a google doc and shared with me by February 9
IF you don't have a gmail account you will not be able to save on a google doc. I recommend you create a gmail for this class. Once you have a login you can access: Drive/New/Doc. Change doc name by highlighting top left, share by choosing the person, top right and typing my email rmalik@rbrhs.org.


Monday, October 20, 2014

The Light Triangle


Understanding Aperture


Over the last couple of weeks I’ve been writing a series of posts on elements that digital photographers need to learn about in order to get out of Auto mode and learn how to manually set the exposure of their shots. I’ve largely focussed upon three elements of the ‘exposure triangle‘ – ISO, Shutter Speed and Aperture. I’ve previously written about the first two and today would like to turn our attention to Aperture.
Before I start with the explanations let me say this. If you can master aperture you put into your grasp real creative control over your camera. In my opinion – aperture is where a lot of the magic happens in photography and as we’ll see below, changes in it can mean the difference between one dimensional and multi dimensional shots.

What is Aperture?

Put most simply – Aperture is ‘the opening in the lens.’
When you hit the shutter release button of your camera a hole opens up that allows your cameras image sensor to catch a glimpse of the scene you’re wanting to capture. The aperture that you set impacts the size of that hole. The larger the hole the more light that gets in – the smaller the hole the less light.
Aperture is measured in ‘f-stops’. You’ll often see them referred to here at Digital Photography School as f/number – for example f/2.8, f/4, f/5.6,f/8,f/22 etc. Moving from one f-stop to the next doubles or halves the size of the amount of opening in your lens (and the amount of light getting through). Keep in mind that a change in shutter speed from one stop to the next doubles or halves the amount of light that gets in also – this means if you increase one and decrease the other you let the same amount of light in – very handy to keep in mind).
One thing that causes a lot of new photographers confusion is that large apertures (where lots of light gets through) are given f/stop smaller numbers and smaller apertures (where less light gets through) have larger f-stop numbers. So f/2.8 is in fact a much larger aperture than f/22. It seems the wrong way around when you first hear it but you’ll get the hang of it.


F:22

Depth of Field and Aperture

There are a number of results of changing the aperture of your shots that you’ll want to keep in mind as you consider your setting but the most noticeable one will be the depth of field that your shot will have.
Depth of Field (DOF) is that amount of your shot that will be in focus. Large depth of field means that most of your image will be in focus whether it’s close to your camera or far away (like the picture to the left where both the foreground and background are largely in focus – taken with an aperture of f/22).
Small (or shallow) depth of field means that only part of the image will be in focus and the rest will be fuzzy (like in the flower at the top of this post (click to enlarge). You’ll see in it that the tip of the yellow stems are in focus but even though they are only 1cm or so behind them that the petals are out of focus. This is a very shallow depth of field and was taken with an aperture of f/4.5).
Aperture has a big impact upon depth of field. Large aperture (remember it’s a smaller number) will decrease depth of field while small aperture (larger numbers) will give you larger depth of field.
It can be a little confusing at first but the way I remember it is that small numbers mean small DOF and large numbers mean large DOF.
Let me illustrate this with two pictures I took earlier this week in my garden of two flowers.
The first picture below (click them to enlarge) on the left was taken with an aperture of f/22 and the second one was taken with an aperture of f/2.8. The difference is quite obvious. The f/22 picture has both the flower and the bud in focus and you’re able to make out the shape of the fence and leaves in the background.
The f/2.8 shot (2nd one) has the left flower in focus (or parts of it) but the depth of field is very shallow and the background is thrown out of focus and the bud to the right of the flower is also less in focus due to it being slightly further away from the camera when the shot was taken.
F-22F-2.8
The best way to get your head around aperture is to get your camera out and do some experimenting. Go outside and find a spot where you’ve got items close to you as well as far away and take a series of shots with different aperture settings from the smallest setting to the largest. You’ll quickly see the impact that it can have and the usefulness of being able to control aperture.

Some styles of photography require large depths of field (and small Apertures)

For example in most landscape photography you’ll see small aperture settings (large numbers) selected by photographers. This ensures that from the foreground to the horizon is relatively in focus.
On the other hand in portrait photography it can be very handy to have your subject perfectly in focus but to have a nice blurry background in order to ensure that your subject is the main focal point and that other elements in the shot are not distracting. In this case you’d choose a large aperture (small number) to ensure a shallow depth of field.
Macro photographers tend to be big users of large apertures to ensure that the element of their subject that they are focusing in on totally captures the attention of the viewer of their images while the rest of the image is completely thrown out of focus.


Read the article and respond to the below. Fill in the appropriate aperture for each and describe how you would change the shutter and ISO (to high, medium or low) and why. Write in google docs and share with me or attach to an email rmalik@rbrhs.org:


1. For landscape:


2. For A child with focus on their face (outside):


3. Three sea shells on the sand sunny day:


4. Table setting with three plates of food inside:

Wednesday, March 26, 2014


Introduction to Shutter Speed in Digital Photography

Previously I’ve introduced the concept of the Exposure Triangle as a way of thinking about getting out of Auto Mode and exploring the idea of manually adjusting the exposure of your shots.

The three main areas that you can adjust are ISO, Aperture and Shutter speed. I’ve previously looked at making adjustments to ISO and now want to turn our attention to shutter speed.

What is Shutter Speed?

As I’ve written elsewhere, defined most basically – shutter speed is ‘the amount of time that the shutter is open’.

In film photography it was the length of time that the film was exposed to the scene you’re photographing and similarly in digital photography shutter speed is the length of time that your image sensor ‘sees’ the scene you’re attempting to capture.

Let me attempt to break down the topic of “Shutter Speed” into some bite sized pieces that should help digital camera owners trying to get their head around shutter speed:


Shutter speed is measured in seconds – or in most cases fractions of seconds. The bigger the denominator the faster the speed (ie 1/1000 is much faster than 1/30).
In most cases you’ll probably be using shutter speeds of 1/60th of a second or faster. This is because anything slower than this is very difficult to use without getting camera shake. Camera shake is when your camera is moving while the shutter is open and results in blur in your photos.
If you’re using a slow shutter speed (anything slower than 1/60) you will need to either use a tripod or some some type of image stabilization (more and more cameras are coming with this built in).
Shutter speeds available to you on your camera will usually double (approximately) with each setting. As a result you’ll usually have the options for the following shutter speeds – 1/500, 1/250, 1/125, 1/60, 1/30, 1/15, 1/8 etc. This ‘doubling’ is handy to keep in mind as aperture settings also double the amount of light that is let in – as a result increasing shutter speed by one stop and decreasing aperture by one stop should give you similar exposure levels (but we’ll talk more about this in a future post).
Some cameras also give you the option for very slow shutter speeds that are not fractions of seconds but are measured in seconds (for example 1 second, 10 seconds, 30 seconds etc). These are used in very low light situations, when you’re going after special effects and/or when you’re trying to capture a lot of movement in a shot. Some cameras also give you the option to shoot in ‘B’ (or ‘Bulb’) mode. Bulb mode lets you keep the shutter open for as long as you hold it down.
When considering what shutter speed to use in an image you should always ask yourself whether anything in your scene is moving and how you’d like to capture that movement. If there is movement in your scene you have the choice of either freezing the movement (so it looks still) or letting the moving object intentionally blur (giving it a sense of movement).
To freeze movement in an image (like in the surfing shot above) you’ll want to choose a faster shutter speed and to let the movement blur you’ll want to choose a slower shutter speed. The actual speeds you should choose will vary depending upon the speed of the subject in your shot and how much you want it to be blurred.

Motion is not always bad. I spoke to one digital camera owner last week who told me that he always used fast shutter speeds and couldn’t understand why anyone would want motion in their images. There are times when motion is good. For example when you’re taking a photo of a waterfall and want to show how fast the water is flowing, or when you’re taking a shot of a racing car and want to give it a feeling of speed, or when you’re taking a shot of a star scape and want to show how the stars move over a longer period of time. In all of these instances choosing a longer shutter speed will be the way to go. However in all of these cases you need to use a tripod or you’ll run the risk of ruining the shots by adding camera movement (a different type of blur than motion blur).
Focal Length and Shutter Speed - another thing to consider when choosing shutter speed is the focal length of the lens you’re using. Longer focal lengths will accentuate the amount of camera shake you have and so you’ll need to choose a faster shutter speed (unless you have image stabilization in your lens or camera). The ‘rule’ of thumb to use with focal length in non image stabilized situations) is to choose a shutter speed with a denominator that is larger than the focal length of the lens. For example if you have a lens that is 50mm 1/60th is probably ok but if you have a 200mm lens you’ll probably want to shoot at around 1/250.
Shutter Speed – Bringing it Together

Remember that thinking about Shutter Speed in isolation from the other two elements of the Exposure Triangle (aperture and ISO) is not really a good idea. As you change shutter speed you’ll need to change one or both of the other elements to compensate for it.

For example if you speed up your shutter speed one stop (for example from 1/125th to 1/250th) you’re effectively letting half as much light into your camera. To compensate for this you’ll probably need to increase your aperture one stop (for example from f16 to f11). The other alternative would be to choose a faster ISO rating (you might want to move from ISO 100 to ISO 400 for example).